After completing this lesson, you’ll be able to:
Workflow management is a technique for controlling workspaces in sequence or branching with inbuilt logic. Part of this technique is being able to author workspaces that are "chained together" to run one after another.
A chain of jobs is one that runs jobs in a particular sequence; either one after the other or in parallel. You can use Automations to implement this on FME Server.
Automations provide a way to handle workflow management within FME Server. To do this, you can simply create an Automation to handle triggering jobs in a particular sequence.
Setting up a job chain within an Automation is as simple as connecting two or more Run Workspace Actions to a Trigger. Depending on the desired behavior, you can connect the run workspace actions together in sequence or in parallel.
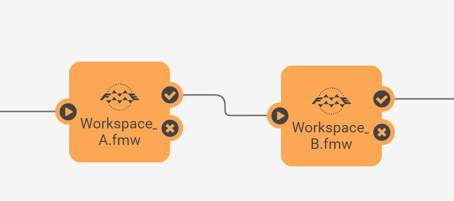
When actions are connected in sequence, they are connected in a string like this:
When connected like this, these jobs will run sequentially. So, the first job will be submitted and FME Server will wait for it to run to completion. When it finishes, the next job will run to completion before the next action in the chain starts.
In this example, since the second workspace is connected to the Success port of the action for the first workspace, it will only run if the first job completes successfully. You can add additional actions connected to the failed ports if you wanted to handle those failures in some way. For example, if you wanted to send an email out if one of the jobs in this Automation failed to complete.
When actions are connected in parallel, they are connected to a single starting point (this can be a Trigger or another Action within the Automation) instead of in a row:
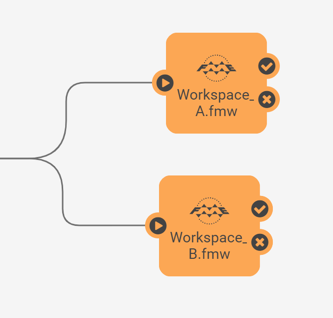
When connected like this, both these jobs will be submitted at the same time.
If there are at least two engines available on FME Server, then they will both run at the same time. If there is only one available engine, one job will run on that engine and the next job will wait in the queue until an engine becomes available. There is no guarantee as to which of these jobs will run first in this case (unless Job Queues have been configured for these workspaces to give them a priority).
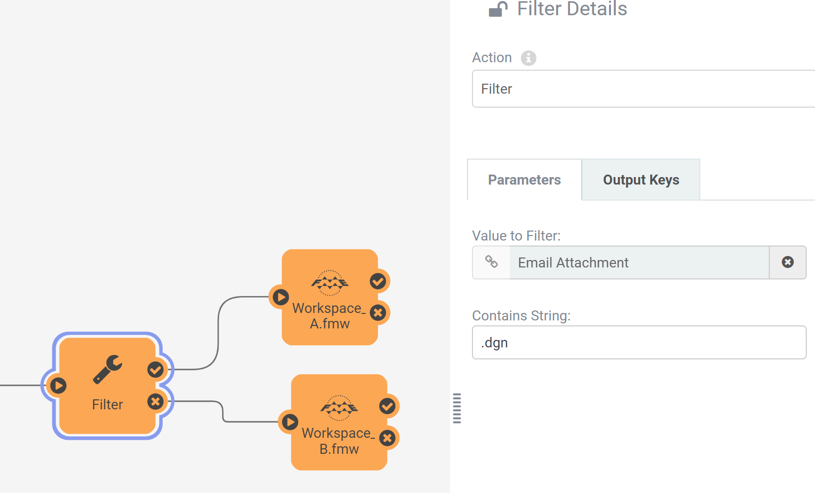
There are two Automation components that are particularly useful if you need to build some additional logic into your Automations. These are the Filter Action and Split-Merge Block.
The Filter Action can be used to check if a simple condition is true or false. In the example below, we are using a Filter to check if an email contained a .dgn file as an attachment. If that is true, we will run one workspace and if it's false, we will run a different workspace.
An additional way to orchestrate jobs is the Split-Merge Block, which lets you run workspaces in parallel and then combine the results. We'll talk more about that in the next lesson.
You're a technical analyst in the GIS department of your local city. You have plenty of experience using FME Desktop, and your department has recently begun using FME Server.
A municipal election is about to happen, and the Elections office has provided a dataset of new voting divisions in GML format. You've already created a workspace to translate these voting divisions to a SpatiaLite database format for use within the city and that data is being written to a resources folder on FME Server so everyone can use it.
Coincidentally, the planning department heard of this update. They have a workspace that assigns voting division IDs to each of the records in the city's address database for use in election planning and would like to have their workspace run automatically whenever there are any updates to the voting divisions.
You realize that you can chain these two translations together to be carried out consecutively and automatically whenever the Election Voting GML file is updated using an Automation.
Download the starting project for this exercise. Then, in the FME Server web interface (2022.0 or later), go to Projects > Manage Projects and import it.
This project contains the two workspaces we want to run in sequence as well as input and output Resource folders for this workflow. Take a moment to familiarize yourself with the contents of this project and look at the two included workspaces using the View Workspace page.
In the FME Server interface, navigate to the Automations > Build page to start building a new Automation.
Save the Automation first and name it JobChaining.
You want these jobs to start running whenever new data is added to the Election/Input folder, so set up a Trigger to handle that.
Click on the Trigger that is already placed in your Automation to configure it. Set the Trigger as follows:
| Parameter | Value |
|---|---|
| Trigger | Resource or Network Directory (updated) |
| Directory to Watch | Data > Election > Input |
| Events to Watch for | MODIFY |
| Poll Interval | 30 Seconds |
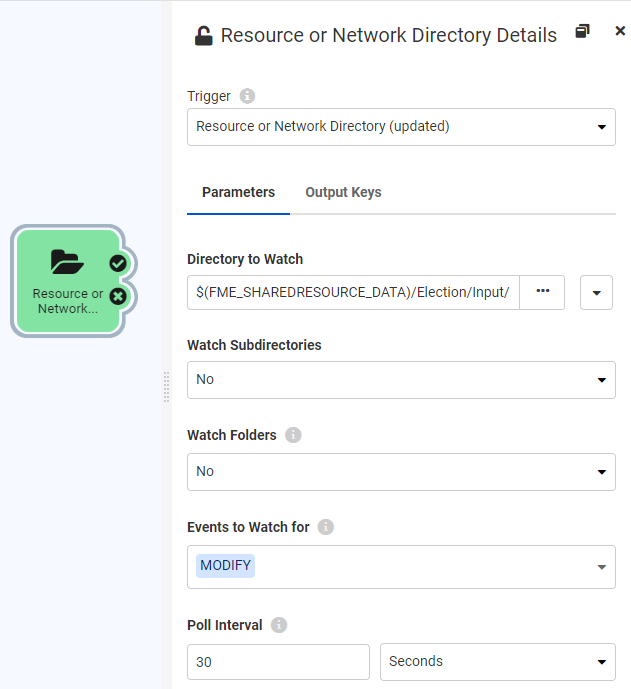
Click Apply.
Now we want to add an Action to run the first of the two workspaces we want to run in our job chain.
Click the Circle icon on the Next Icon object, or click on the + button and drag an Action onto the canvas. Connect it to the Resource or Network Directory (updated) Trigger Success port and configure it as follows:
| Action | Run a Workspace |
| Repository | Training |
| Workspace | exercise-chain-multiple-jobs-in-an-automation-a.fmw |
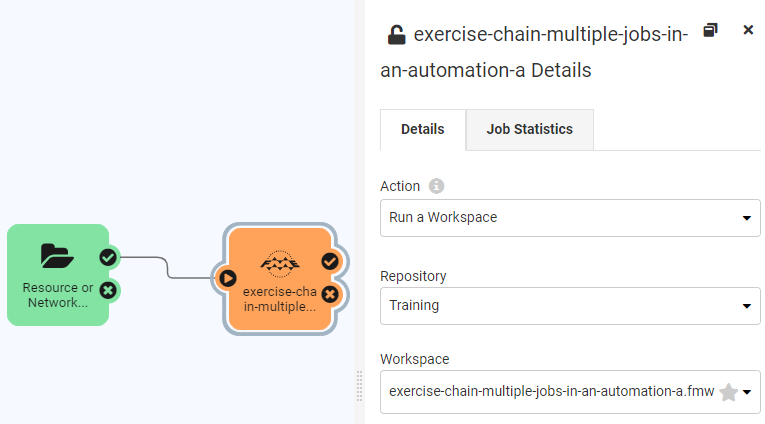
Remember that a Workspace Action will always wait until the job finishes before moving onto the next Action within the Automation.
To set up the second workspace to run, simply add a second Action and connect it to the Succeeded port on the Workspace Action we just added. Configure this one to run exercise-chain-multiple-jobs-in-an-automation-b.fmw in the Training repository.
Your final Automation should look like this:
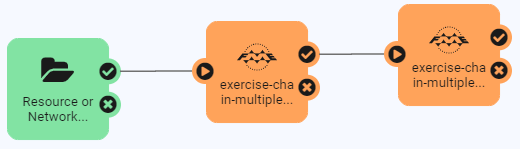
Save your Automation. Then click the Start Automation button to start the Automation.
Now you can test the Automation by uploading a modified version of the ElectionVoting.gml file to Resources.
Open the Resources page and navigate to Data > Election > Input. Click on Upload > Files and upload this file.
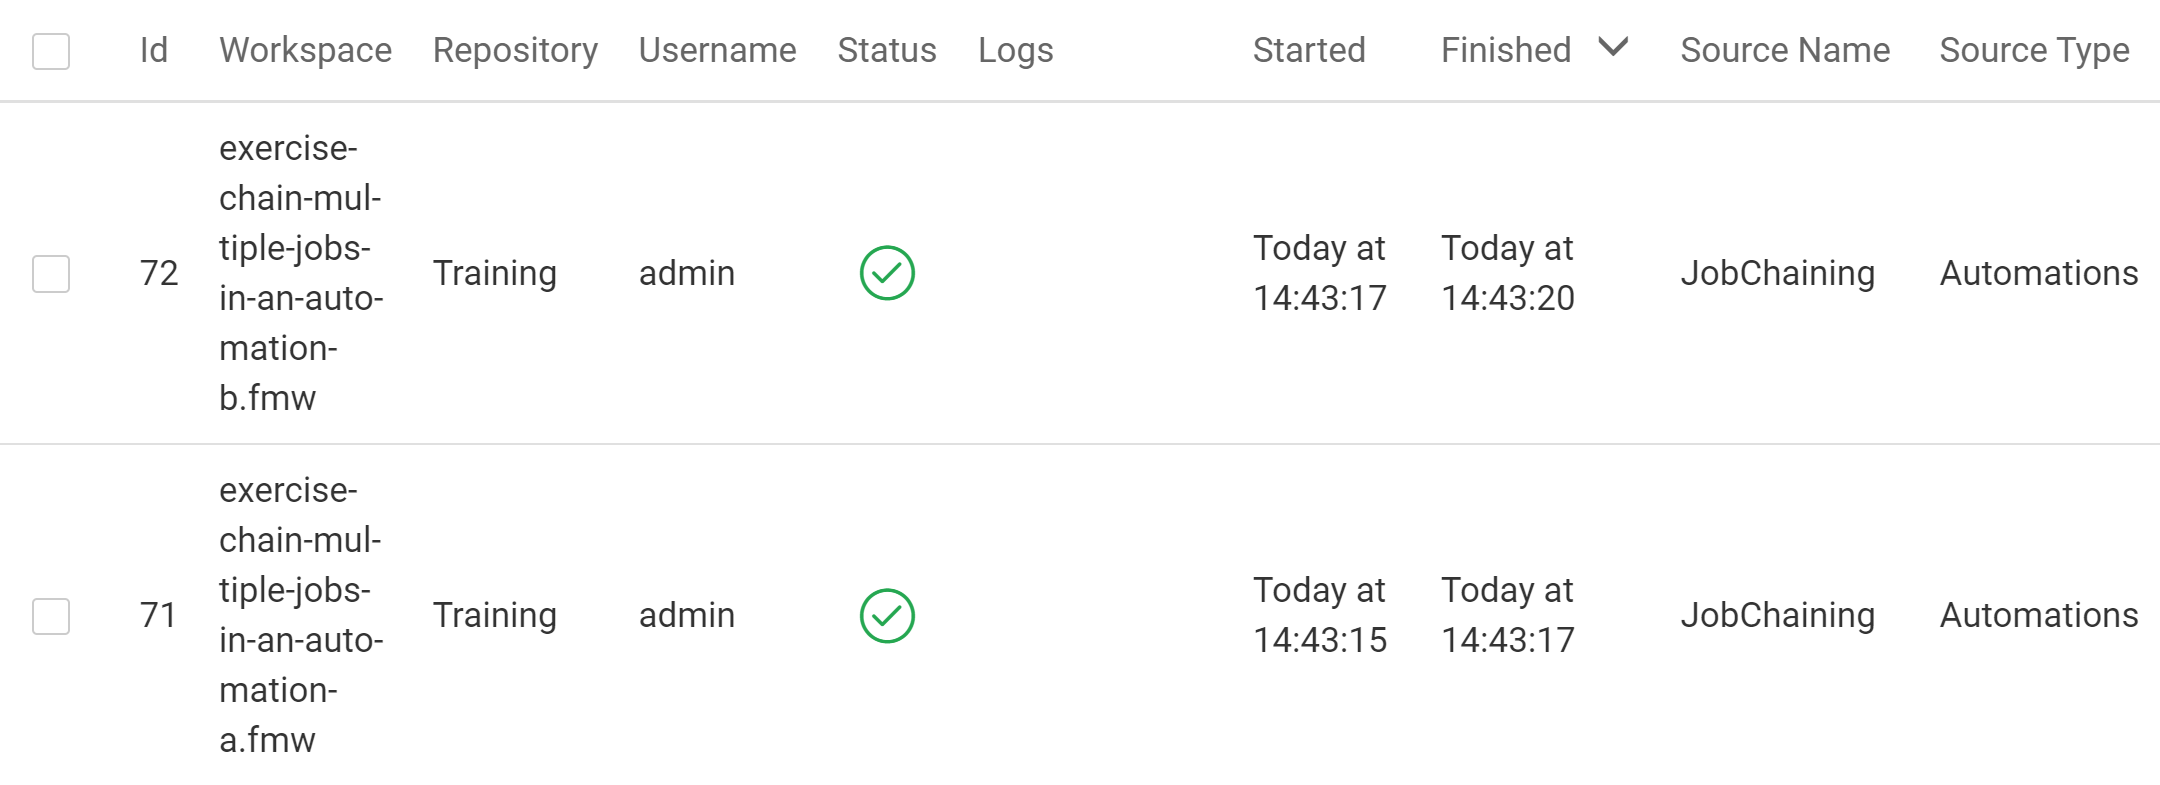
Wait a minute or so and then View Triggered Jobs for your Automation. You should see that both chained workspaces successfully ran in order.